

Pack browser
The pack browser is what you see at the root URL when you’re signed in. It lists every pack in your library as a tile with a thumbnail, plus a sidebar for filtering by pack kind.
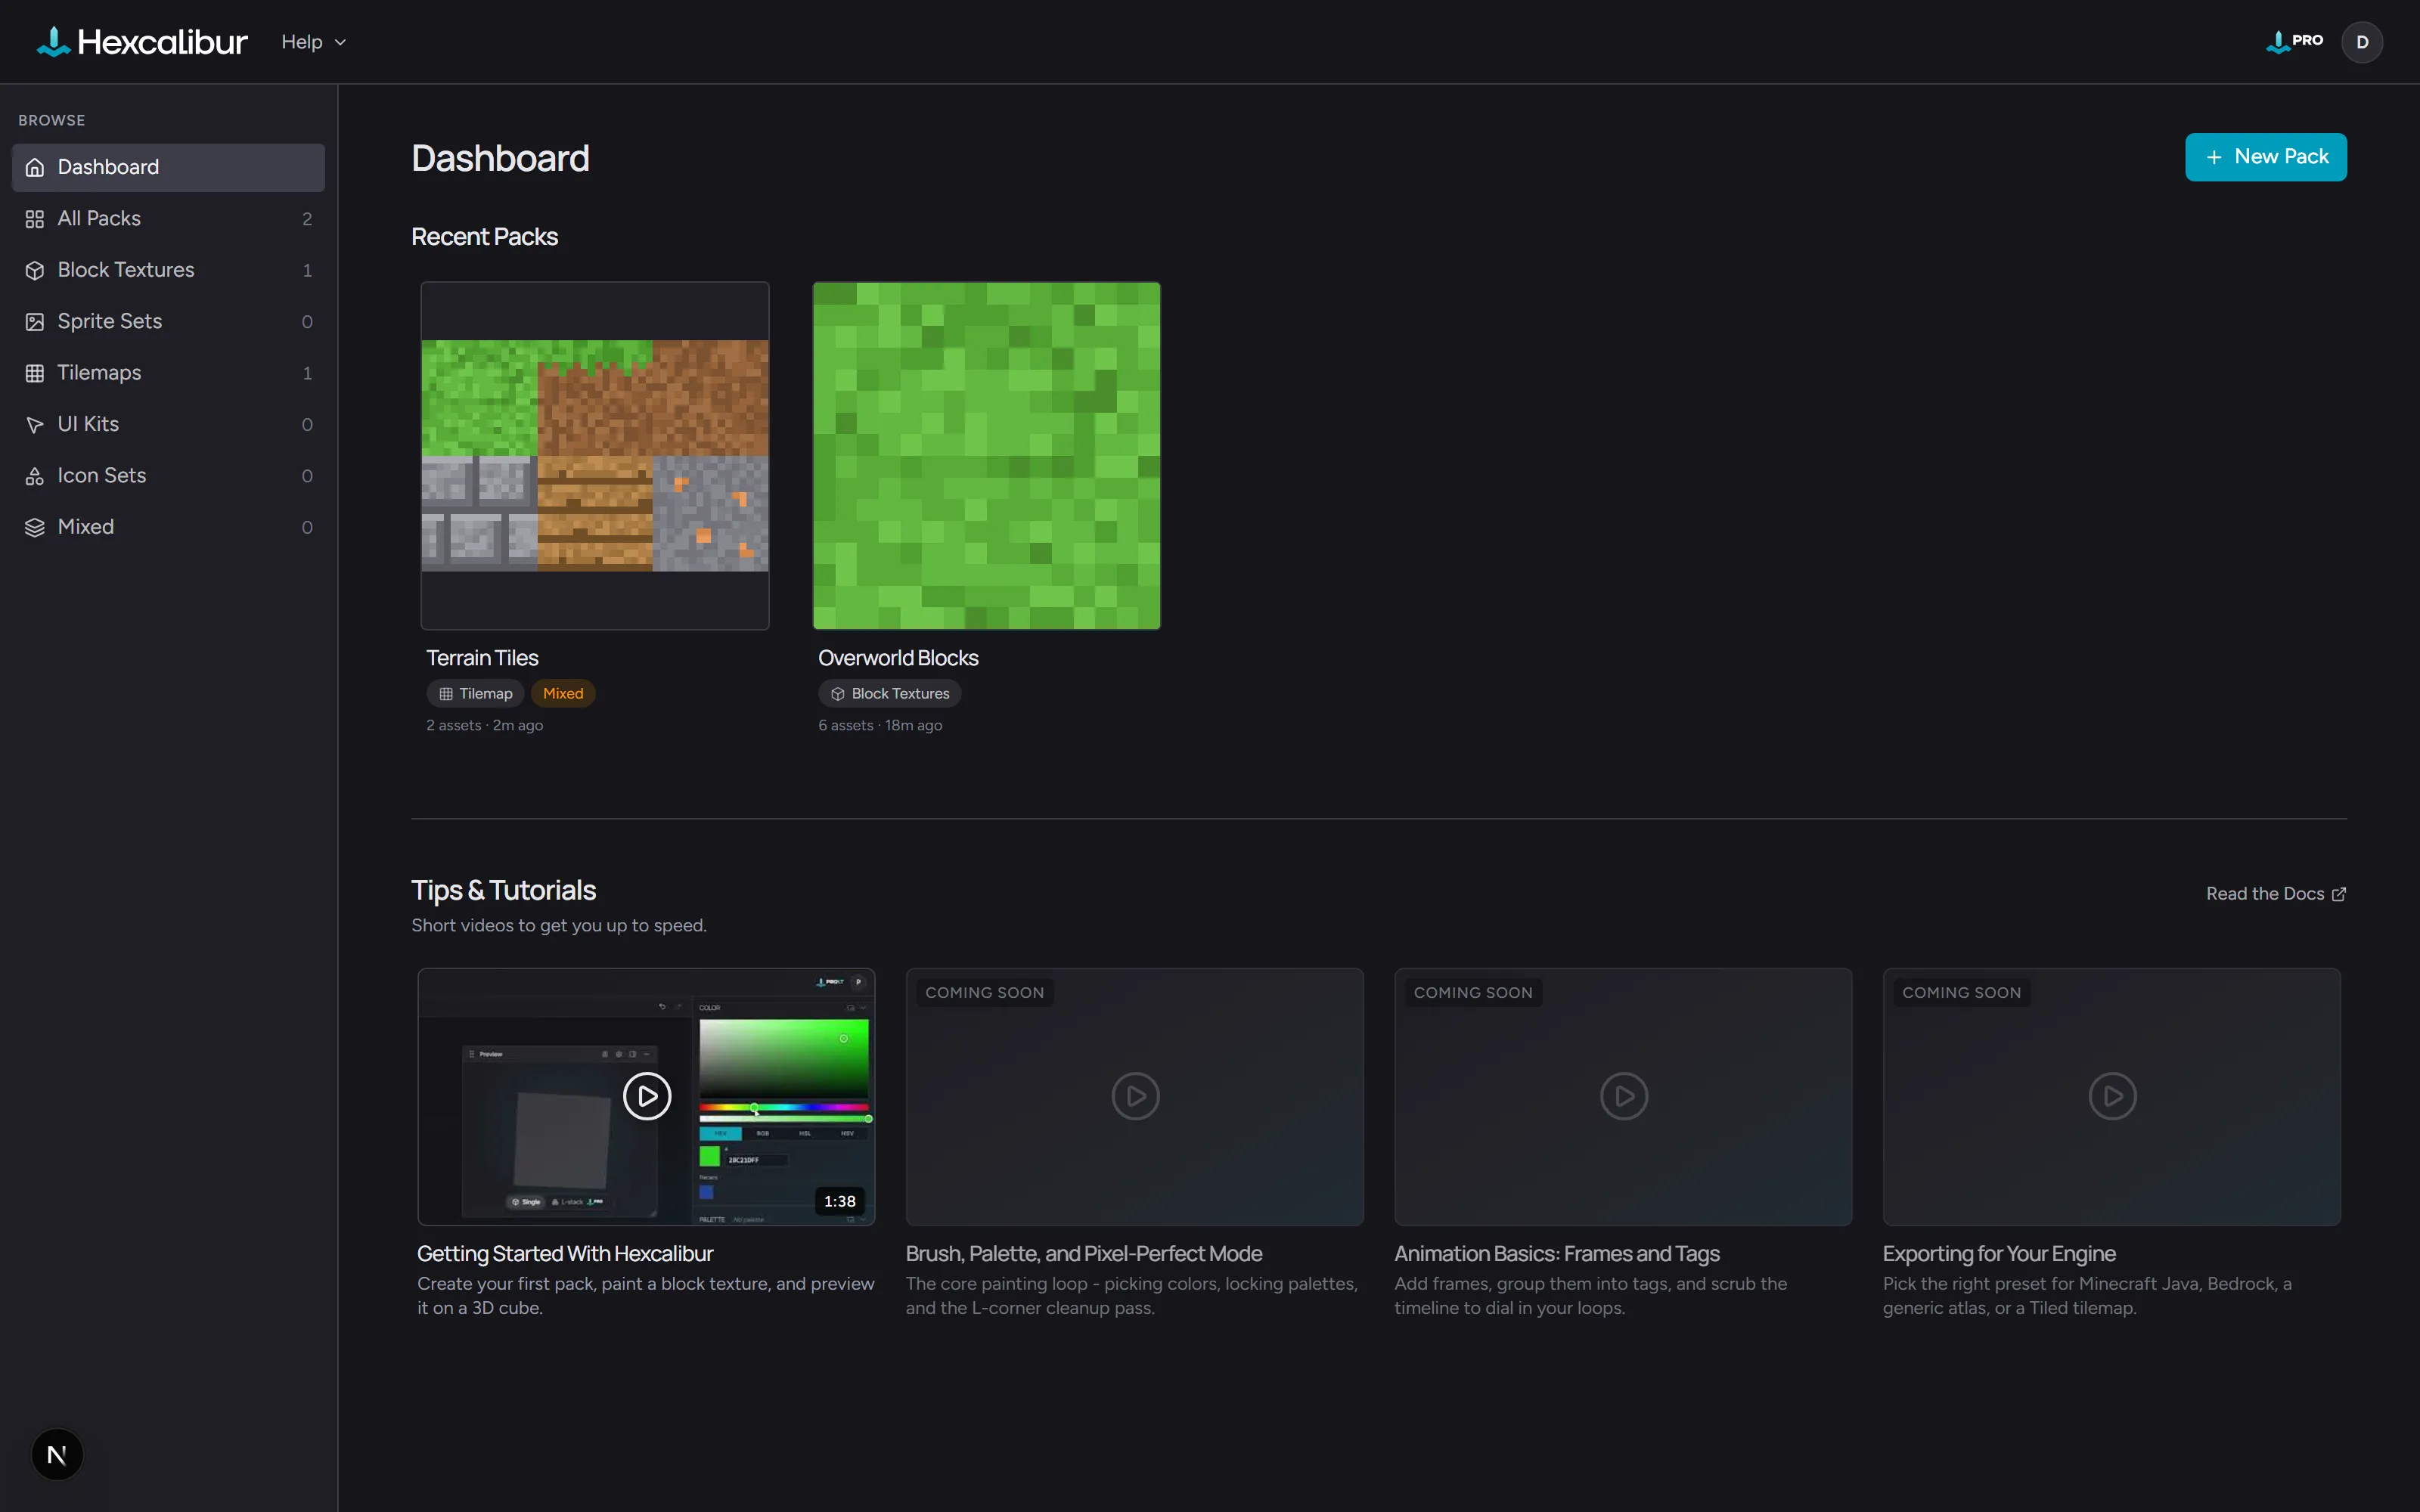
The Hexcalibur logo (top-left) returns you to the pack browser from anywhere in the editor.
Each tile shows the pack’s cover thumbnail (the active asset when you last left it, or a placeholder if the pack is empty), the pack name, and a small badge for the pack kind. Click a tile to open the pack at its first asset.
The trailing + New pack tile is always at the end of the grid -
click for a quick-create shortcut to the same modal as File →
New pack.
The kind filter sidebar
Section titled “The kind filter sidebar”The left sidebar lets you scope the grid by pack kind:
- All packs - everything
- Block textures - voxel-game block-texture packs
- Sprite sets - character and item sprites
- Tilemaps - 2D game tile sets
- UI kits - HUD and interface element packs
- Icon sets - small standalone icons
- Mixed - packs with no specific kind
Each filter row shows the count of packs in that kind. The grid re-renders instantly when you switch.
Creating a pack
Section titled “Creating a pack”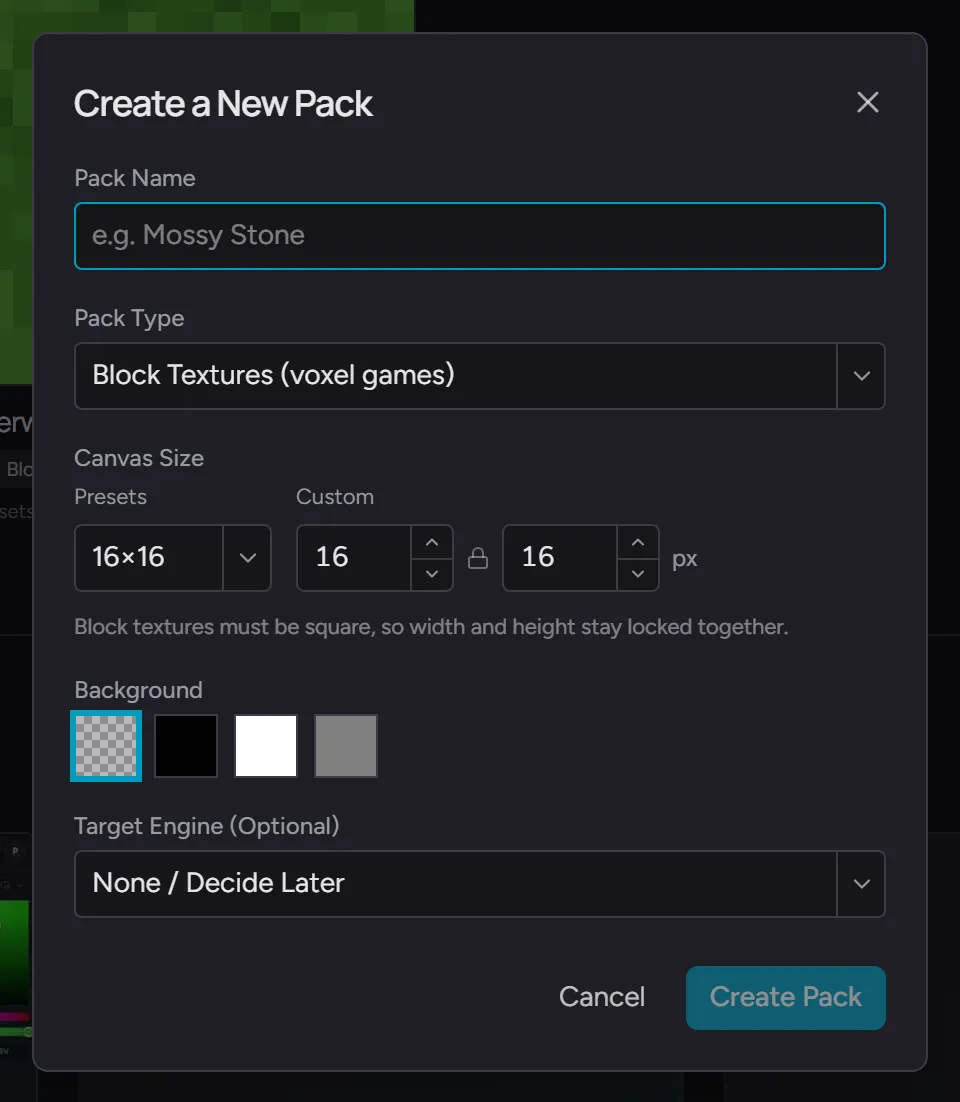
Click + New pack (top-right or trailing tile) for the New
Pack modal. You’ll set:
- Pack Name - used for the URL slug and shown on the tile
- Pack Type - drives the default asset type and canvas size
- Target Engine (Optional) - pre-selects this engine in the Export dialog when you eventually export
- Default Size - the canvas dimensions new assets in this pack start at. A quick-pick row offers the common pixel-art sizes (16×16, 24×24, 32×32, 48×48, 64×64, 128×128, 256×256) and the Width × Height inputs accept any value from 8 to 512 pixels per axis. Block-texture packs lock height to width because cube faces need to be square; every other pack type accepts non-square dimensions (e.g. 50×80 for a portrait sprite, 320×180 for a 16:9 banner). Sizes above 256 show a soft performance warning - they still work, just expect more memory pressure on slower machines.
Submit and Hexcalibur creates the pack with one starter asset and opens it in the editor.
Free-tier users can have 1 pack. Trying to create a second opens an inline upgrade modal - see Free vs Pro.
Importing a pack
Section titled “Importing a pack”Click Import Pack (next to New Pack, top-right) and pick a
.hexc file to bring in a whole pack - your own backup or one
someone shared with you. Importing always creates a new pack and
leaves your existing packs untouched. See
Pack files for the full story.
Selecting multiple packs
Section titled “Selecting multiple packs”Hover a tile and a checkbox appears in its top-left corner. Check it and the browser enters selection mode: every tile shows its checkbox, and clicking a tile now adds it to (or removes it from) the selection instead of opening it.
While packs are selected, the top-right of the grid shows how many, plus:
- Select All - selects every pack currently visible in the grid
- Delete - deletes the selected packs and all of their assets, after a confirmation that shows the totals. This can’t be undone.
- Cancel - clears the selection (pressing
Escdoes the same)
The starter pack
Section titled “The starter pack”The first time you sign in on a device, Hexcalibur creates a pack called My First Pack with one 16×16 block-texture asset, so the browser isn’t empty on day one. You can rename it, add to it, or delete it - it’s a normal pack record.
Deleting and refreshing won’t bring it back; the auto-create only runs once per device.