

Import a tileset
Already have a tileset image - an itch.io pack, RPG Maker resources, a sheet you exported from another tool? Import Tileset turns it into a ready-to-paint tileset in one step, so you can start stamping and building tilemaps with art you already own. (Prefer to draw your own from scratch? Tile → Draw a Blank Tileset mints a blank grid instead - see Create a tileset.)
Importing
Section titled “Importing”Pick Tile → Import Tileset… (also available from File → Import Tileset…, the import icon in the Tile Shelf’s header, or by dropping the image onto the canvas and choosing Import as Tileset).
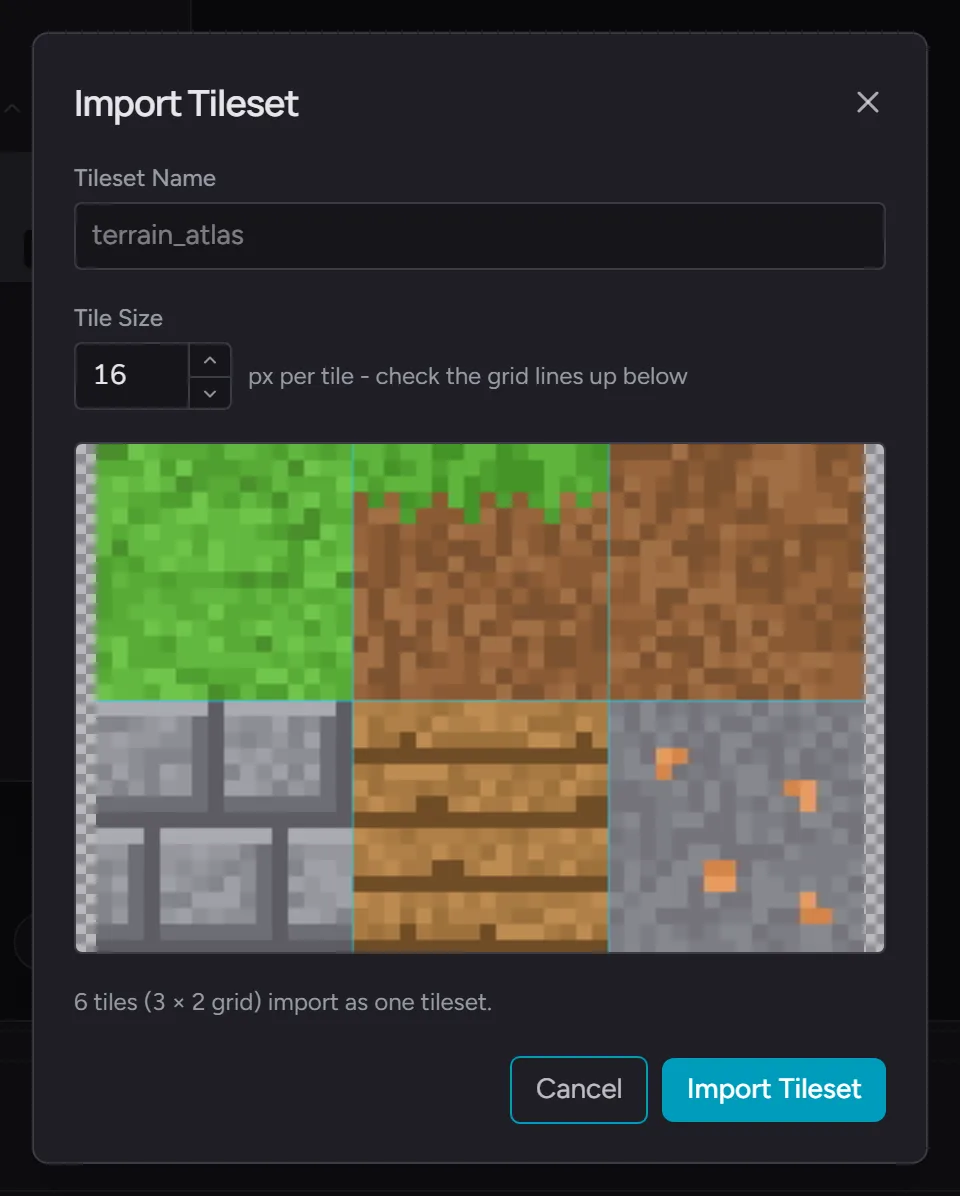
The dialog shows your sheet with a live slicing grid over it:
- Tileset Name - names the tileset; each tile is numbered within it. Pre-filled from the file name.
- Tile Size - the cell size the grid slices at, pre-filled from your pack’s tiles when they agree on a size. Adjust it until the grid lines sit on the sheet’s tile boundaries; the preview updates as you type.
A summary line shows how many tiles the sheet holds. Completely empty cells are skipped, so a sparse sheet does not add blank tiles.
Click Import Tileset. The whole sheet imports as a single tileset, ready to paint with right away. One undo removes it.
Where the tiles go
Section titled “Where the tiles go”The tileset gets its own tab in the Tile Shelf (marked with a grid icon), drawn as one continuous atlas - every tile in its original position, so the sheet still reads the way its artist laid it out.
- Click a tile to arm it, then paint it onto a map.
- Drag across the atlas to grab a multi-tile
block
- a tree or a building stamps in one move.
- Stamp / Edit toggle - the header toggle decides what a click does: Stamp arms a tile to paint with (the default for an import), Edit opens the clicked tile for drawing. See Stamp or Edit a tileset.
- Pop it out - the pop-out icon in the tab header opens the tileset in a floating, resizable window that stays on top, with its own zoom. Handy for a tall sheet that outgrows the shelf.
- Show the grid - the grid icon outlines the tiles in the atlas. It is off by default; turn it on when you want to see the cell spacing.
Editing a tile
Section titled “Editing a tile”Right-click any tile in the atlas (in the shelf or the popout) and choose Edit this tile - or flip the panel’s Stamp / Edit toggle to Edit and just click the tile. Either way it opens for painting, and your changes apply everywhere the tile is used - every map, the tileset itself, and whatever you stamp next - all at once, with the tile’s number unchanged. To undo the changes, right-click the tile again and choose Revert to original.
This is the fastest way to tweak imported art in place: recolor a roof, fix a seam, brighten the grass, and every map updates live.
Limits
Section titled “Limits”- PNG, JPEG, or WEBP, up to 4 MB - the same bounds as every image import.
- Sheets up to 4096 pixels per side. There is no cap on the number of tiles - the whole sheet imports as one tileset.
- A tileset is a single asset, so it fits the free plan’s per-pack asset limit. You can import and paint with tilesets on the free plan; cloud backup of your packs stays on Pro, so a free import lives in your browser.